Creating a Product Page-Apple App Store

A well-crafted Product Page for your mobile app on the Apple App Store is a must for desired results, such as organic downloads and profit. Each element of your Product Page has the power to influence your mobile app. The chief aim behind making a Product Page is to get users engaged with your mobile app. It is efficient using well-defined meta-data based on users' search results. Are you planning to launch an iOS app or an Android app? Then keep scrolling down and follow this guide to publishing your mobile app on the App Store and Play Store. And you will also get to know the key ingredients of creating a product page.
What is a Product Page for your mobile app on the App Store?
Mobile apps play a vital role in our daily lives in this fast-paced and tech-driven era. People use mobile apps to manage their finances and connect with friends to make doctor appointments. Startups and tech giants work day and night to release mobile apps for every niche. Thus, your mobile app needs to be discoverable to people coming to search for your mobile app on the App Store. That's where the need to create a Product Page for your app comes into play.
A Product Page is a digital marketing platform for your iOS mobile app. And its job is to creatively and beautifully showcase your app and its features to your audience. There are millions of such pages on the App Store, each describing a unique product. If you want your app at the top of the App Store charts, your mobile app must be easily discoverable & downloadable by your users and potential customers.
Let's see how you should create a Product Page and its key ingredients.
Critical ingredients for creating a Product Page on the Apple App Store
The Apple App Store's primary platform for publishing mobile apps is famous without doubts or exceptions. Apple follows a strict review process for the same. Because Apple only wants the best iOS mobile apps in their App Store. So, to create a Product Page at the Apple App Store for your newly built mobile app, the first step is to create an account on Apple's "App Store Connect" and follow the guidelines.
Now, before getting into how to create a product page for your app, let's learn what the very first requirement is.
The first thing to launch an app is to develop it with the help of a very experienced team of developers. Because Apple only favors mobile apps developed while keeping Apple products in the account, which means developing or getting your iOS app set in Xcode (open source or free to use IDE) using Swift framework (SwiftUI) and the latest iOS SDK (Software Development Kit).
Xcode has preferable iOS UX/UI elements - the bottom navigation bar and Dark Mode. Use the tools Apple releases to ensure that your iOS app smoothly passes the review process.
 |
| An iOS app getting developed in the Xcode using SwiftUI |
Signing up to use Xcode for the Apple Developer Program is unnecessary. But you'll need an account if you get your app tested and published. And you can use Apple's complete range of developer products to publish your mobile app on the App Store.
There is no way around getting a membership to launch an iOS app. But it's good news since researches show iOS apps are good at earning double the amount of money than Android apps, making the membership fee back in no time. With this membership plan (USD 99 a year), you'll gain access to beta OS releases, distribute your app in the App Store, have capabilities such as Face ID, and have Apple's support program at your fingertips.
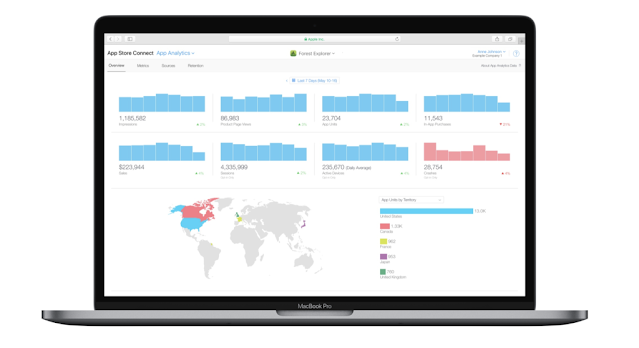 |
| App Store Connect: Launch your iOS apps and see analytics. |
Remember, membership is essential if you have considered monetizing your app through subscriptions and in-app purchases. And you'll be allowed to keep 70%-85% of the earnings.
Remember: Before you move forward to launch your iOS app for your users, it's recommended to test it with real users in the App Store using TestFlight (a beta test program to try your app's beta version) because it'll enable you to test your app's features and functionalities before launching it for, say, over 10K users, and send out the invites via share link or email. You can also review users' feedback and crash reports on your app's TestFlight page. Users' feedback is crucial at this stage and will also help you make last-minute improvements.
Now, if you're done with all the above prerequisites, you're ready to launch your iOS App using the following steps:
Step - 1: Choose your app's Build Version.
On the App Store Connect page, you may upload multiple builds for every mobile app version. But, it's advised to choose only one building associated with the app's performance that you will publish to the App Store.
For this, head to My Apps and select an app, then select an app version, and then move down to the build section on the same page.
 |
| Picking the app build. |
Note: If you see no available build, upload one using Xcode. The good thing is that you can alter your build selection before submitting your app's version for review.
Step - 2: Selecting app pricing and available territories
This section of App Store Connect offers special pricing and availability of parts for your iOS app.
Remember, even if your app is free, you must mention a start and end date. And if you have yet to alter the pricing soon, pick no end date. You can also schedule a price change. It'll come in handy for those who like to launch an app for free to gain traction and then switch to a paid app later.

Moving on to the territories section, you need to select those areas where your app will be available to download once published. And if you choose "All Territories," your app will become known worldwide. However, starting with a few territories for new apps and expanding later is always recommended. It's a best practice to test how a mobile app impacts a smaller market before rolling it for users worldwide.
 |
| Selecting the territories. |
Note: You should always begin with countries that speak your app's native language. For example, if your app is in Hindi, you would first target the North Indian region for languages such as Bengali, Tamil, Telugu, Marathi, Gujarati, Finnish, German, Mandarin, etc.
This section also allows you to select the new territories (at the bottom). It makes your app automatically available in regions when the App Store expands. When you are done launching your app, you can begin with managing your app's territories and localizations using the App Store Optimization tool available in the App Radar.
Step - 3: Filling your app's Meta-data and Optimize for keywords
Before clicking the submit button, ensure your app's meta-data is filled accurately and optimized for relevant keywords. For this, use App Store Optimization (ASO).
A mobile app's meta-data is your app's information. It includes the following fields:
- Name (or Title) of your app,
- The subtitle of your app,
- Your app's Description, and
- Keywords used to describe your app.
Besides filling out the above info, you must select your app's category and primary language.
 |
| Placing app's info: App Name, Subtitle, and Keywords. |
 |
| App Radar ASO Tool: To find relevant keywords that drive App Store traffic and downloads. |
Remember: App mentioned above, meta-data fields profoundly influence your app's success in the App Store because they are crucial to your app's discovery, ranking in the App Store, and your overall strategy for ASO. And remember to use App Radar ASO Tool. Using this tool, you can find lucrative keywords. And the best thing is that it's a free tool to track your keywords ranking and check what keywords your competitors use!
Note: Remember the app's icon, screenshots, and preview video while launching your iOS mobile app. Because visuals play a crucial role in influencing users to download your app, it makes sense to use them since they allow users to preview what your app is all about and what it does.
Step - 4: Submitting your app for its review
With this last step, you're almost there!
Apple is known for the quality of its products, and it cares a lot about the apps available in its App Store. And they will never approve a buggy app that doesn't follow their security or privacy policies and design and development guidelines.
 |
| Choosing to get your app published post its approval. |
Thus, always check the App Store Connect Page's Version-Release section before submitting your app. Once there is approval for your app, you can publish your mobile app immediately or schedule it to post on the desired date.
Step - 5: Communication after submitting your app for its review
Once you submit your app for review, its status will change to "Waiting For Review." And when your app gets reviewed from Apple's end, the group turns to a "yellow indicator labeled "In Review."
Now, if there is any technical issue or your app gets rejected, you may communicate the same with Apple in the Resolution Center to get your problem resolved in time. Once that's done, you can resubmit your mobile app for its review.
Finally, if all the above things are covered accurately, your iOS mobile app will go live for users to download and install in the App Store within 24 hours after its approval.
What's next?
When you finish everything discussed above, the next thing is to keep using the App Store Optimization (ASO) or Mobile App SEO to keep your app at the top of the App Store's charts. ASO is a must to optimize your mobile Apps' search on its App store to attain sustainability in the mobile app market and get maximum user attention. Users gained through ASO are more loyal than those influenced by paid means!
The Bottom Line
The bottom line while creating a Product Page on the App Store is to give your app visibility and discoverability so that users can find it quickly and you can earn desired profits. Thus, when you have everything discussed above ready, it's time to explore and analyze the factors that affect your app's performance. Following this, you can make all the changes & improvements. And repeat - try, make mistakes, and try again!
For more details on how you can make it more effective to popularize your product, follow our other blogs and social media channels for the latest updates. And as always, if you are out for any help in web or iOS and Android mobile app development or product consultations, Quokka Labs is just a call or message away. Contact us now to get your free quote today!


Comments
Post a Comment